Facebook Instagram Pinterest TeachersPayTeachers BlogLovin Home Image Map
Showing posts with label colors. Show all posts

October 10, 2012

Halloween Bugs Book and Craft for Preschoolers

I just love Fall and Halloween, can you tell?  There's so much fun to be had!

One of my favorite books for toddlers and preschoolers is Halloween Bugs by David Carter.  The kids just can't seem to get enough of this little lift-the-flap book!  Even my elementary school-aged kids love it.  Each page features a unique lift-the-flap door with a bug-in-disguise hiding behind.  Some of the bugs pop out, some have crazy hair, and some are just plain silly.  Another feature I love is that it has repetitive-line text.   Each page asks, "Who's behind the _____ door?"

I'm using it this week to work with young preschoolers who are working on building two-word phrases and/or consonant-vowel-consonant (CVC) words.  I can easily change the text to suit whichever goal I'm working on.  For example, instead of using "Who's behind the door?", I might say "Knock knock!" to target a CVC word.  Before I allow the child to open the door, I might have him say "Open door"  or "red door" to target a two-word phrase.  Depending on what we find behind the door, we can say a descriptive CVC word, and we can say "bug".  Before we close the door again, we can say "Bye Bug".

Download this page to make the Knock Knock Paper Bag Book
I made a little activity to go along with this book that my students can take home with them.  It's a book whose pages are made from paper lunch sacks!  This is how I did it.  I cut out the "Knock Knock!" squares and the Halloween graphics from the printout you can grab here.  I used darling graphics from Scrappin' Doodles to make it.


I stacked four paper lunch sacks and cut off the top 3-4'' and then stapled them together.


I glued one "Knock Knock" square on the first paper sack, and a red rectangle door that I cut from card stock on top of the bag bottom, which is like a flap.


I lifted the flap and glued the moon graphic under the flap, and then flattened the flap to close the door. I like to let my graphics peek out a bit from behind the door to give the kids a hint to what they might find when they open it.  Repeat for the remaining pages.  You could change the colors of each door if you want, or you could just draw a door shape using a marker if you don't have time to cut and paste on doors.  In fact, I've been drawing doors on the flaps all week and it's actually worked out better.  You can make the doors "spooky" by letting the child put Halloween stickers on them, too.  That's it!  Super easy, and super fun.

You could do a variation of this book with older kids, too.  Just think up a repetitive line that will work with your goals, and write it with a marker on each page.  If you're working on adjectives, you could let your students make the doors be dusty, sparkly, spooky or whatever you decide.  You could have the kids make bugs to hide behind the doors, just like in the book, and you could embellish them with yarn, paper shreds, googly eyes, etc.  Or, check this out:  I grabbed this cute memory game made by Carrie at Carrie's Speech Corner last week from Pinterest.  Thanks, Carrie!  You could hide these cute trick-or-treaters behind your doors!  Language opportunities abound!

I hope you find this idea as much fun as I do!


Pam

April 10, 2012

Move and Talk: Story Templates for Tapikeo HD

Last month, I shared with you how I used the Tapikeo HD app to create an interactive activity in one of my treatment sessions.  Many of you showed interest in that particular activity, so together with Takikeo's developer, Jean-Eudes Lepelletier, I created a couple of free templates for treatment activities to share with you.  These templates have been made available on Jean-Eudes' website and Facebook page and right here on my blog!

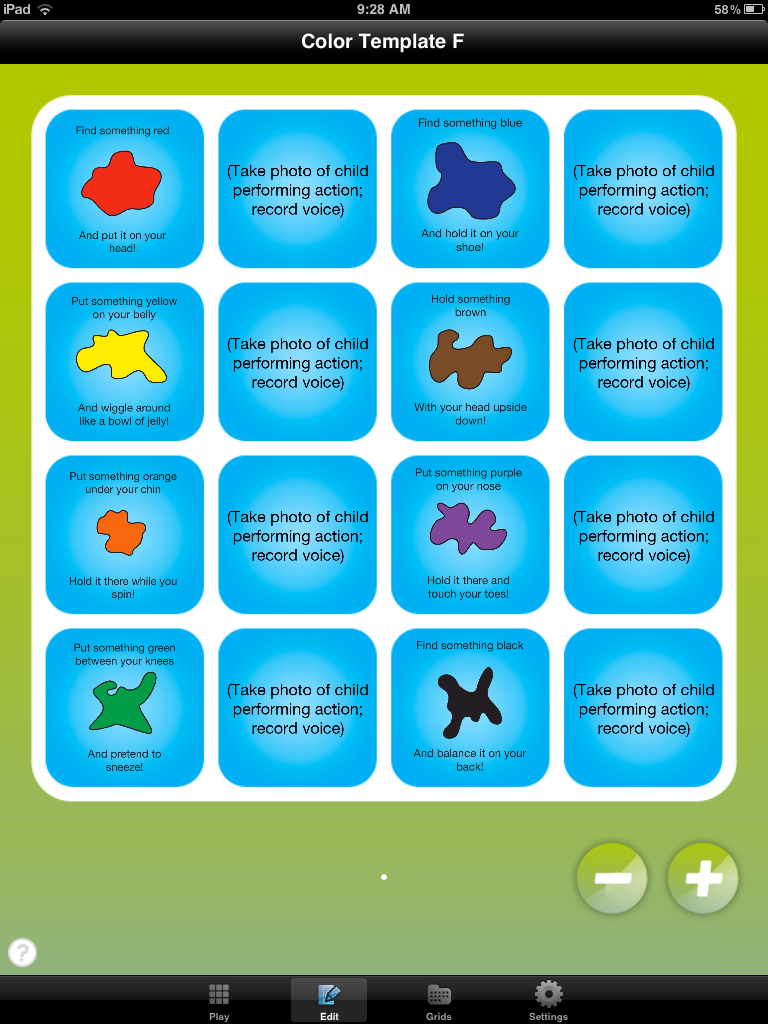
The first is called Move and Talk: Colors.  It is a little story that incorporates following directions, colors and movement, and can be customized to target specific speech and/or language goals.  This is how I use it:

Move and Talk: Colors Template as it appears when you download it onto Tapikeo HD

After downloading the grid from the server and opening it in my Tapikeo app, I am ready to make it my own.  First, I find it in the "Your Exports" section of the Grid Manager.  I select "Import", which moves a copy of the template to the "Your Grids" section of the Grid Manager.  I select the template then go to Grid Settings to rename this story.  Then I press "done" and am ready to create my story.  Next, press "Select and Play, and then press "edit", which you will find at the bottom of the screen.

Cell 2 - Customization
Cell 1 - Direction for the Child


I show the child the first cell, and read the text.  While the child finds a red object, I touch the second cell.  (By the way, I usually collect objects of various colors beforehand and keep them in a large basket that is accessible to the child.  This saves a bunch of time!)  I touch the "new" button to take a picture of the child performing the action.  This photo will become page 2 of our story and will replace the text or photo that appears in this cell as a template.  I then ask the child to say a target word, phrase, or sentence, and record him or her saying it.  For this example, the child said "Red on my head", because we were working on using the final /d/ sound.  We play it back to review, and if we are satisfied, I touch "done", which takes us back to the main grid.  I repeat this sequence for each of the colors in the story until it is completed.

Example of a  template cell in Play Mode
Example of a customized cell in Play Mode


When all the cells are completed, you are ready to play back your story.  Touch "play" at the bottom of the screen, and touch the blinking cell in the upper left corner of the grid.  That's it!  Easy!  And completed in less than 15 minutes.

The second story is one I use with my /r/ kids, to increase the level of difficulty while they practice saying target words in phrases and sentences.  It is called Move and Talk: Final AR.  This is what it looks like:

Move and Talk: Final AR Template

 Use this template in the same way as described for the Move and Talk: Color story, except record the child saying the target phrase or sentence as directed in the story.

Move and Talk:  Final AR grid with photos added


Template text disappears when you add a photo to the grid;  Add your own text by typing it in during the customization process.


So what do you think?  Do you like these?  If so, you can download one or both of them here (once you purchase the Tapikeo HD app):

Move and Talk: Colors
.tpk file:  http://bit.ly/MoveWithColorsTpk
web version:  http://bit.ly/MoveWithColorsInternet

Move and Talk: Final AR
.tpk file:  http://bit.ly/MoveTalkFinalAR_Tpk
web version:  http://bit.ly/MoveAndTakFinalAR_Web


If you don't already have the Tapikeo HD app, now is a great time to get it, because the 3.0 version is just being released.  You can purchase it through the App Store today!

I'd love your feedback on these templates.  I've been enjoying using them with my kids, and their parents absolutely love them!  I've got some other ideas in the works too; let me know if you want me to share them.

By the way, can you tell I just love Tapikeo HD?  It can be used SO MANY different ways with every child and family on my caseload.  The possibilities are endless!  A HUGE thanks to Jean-Eudes for creating this fabulous treatment tool!

Nice chatting with you!

Pam