Facebook Instagram Pinterest TeachersPayTeachers BlogLovin Home Image Map
Showing posts with label following directions. Show all posts

November 4, 2015

Paper Bag Owl Craft


These paper bag owls made from paper lunch sacks have been a big hit in my speech room this week! Let me show you how to make them. Here's what you'll need to prepare:


  • buy large-sized paper lunch sacks
  • cut out hearts from patterned scrapbook paper or construction paper. My hearts were approximately 4"x5"
  • cut out circles of three different sizes. I made mine 3", 2.5" and 1". Make the largest circles any color you want, make the medium-sized circles white or cream, and the small circles black.
  • cut out triangles for the beak and feet. Mine were 2" triangles.


First, cut 2 inches off the top of a lunch sack. I used a large-sized lunch sack, which was approximately 6" x 4" x 12.25".


Next, measure 2.5" down from the top of the flat side of the bag (i.e. the side that doesn't have the bottom folded up) and mark it.


Fold the top of the bag over at the 2.5" mark and make a crease across the top.


Open the folded flap and cut the corners off diagonally by starting at the center point and cutting across to the edge at the fold.


Cut off both corners to make a triangle.


Fold the triangle down along the crease. It should look like the picture above. If you want the triangle to rest closer to your owl's eyes, fold an inch below the original crease.


Glue the heart on so the point is almost at the bottom of the bag.


Glue the large circles on first,


...followed by the white and black.


The beak goes on next.


Turn the owl over and glue two triangles on the back, with half of each triangle sticking off the bag.


Gently open the bag and set the opened bag on the table with the owl facing you.


Gather the top edges of the bag in at the side folds and fold the triangle back over the front. That's it! Aren't they so cute??? We filled our owl bags with homework pictures and worksheets to take home. Perfect!

You can work on all sorts of language goals with this little craft. Here are a few suggestions:


  • shapes
  • sizes
  • colors
  • following directions
  • plurals
  • possessives
  • pronouns
  • sequencing
I love these, and I hope you do, too!

March 23, 2015

It's National Puppy Day!

My Grand-Puppy Murphy!!!
I opened my computer this morning and discovered that it's National Puppy Day! It couldn't have come at a better time, because it's been all about dogs around here at Small Talk.  Want to know what we've been doing? Great! Because I can't wait to share!

We've been playing fun games like...


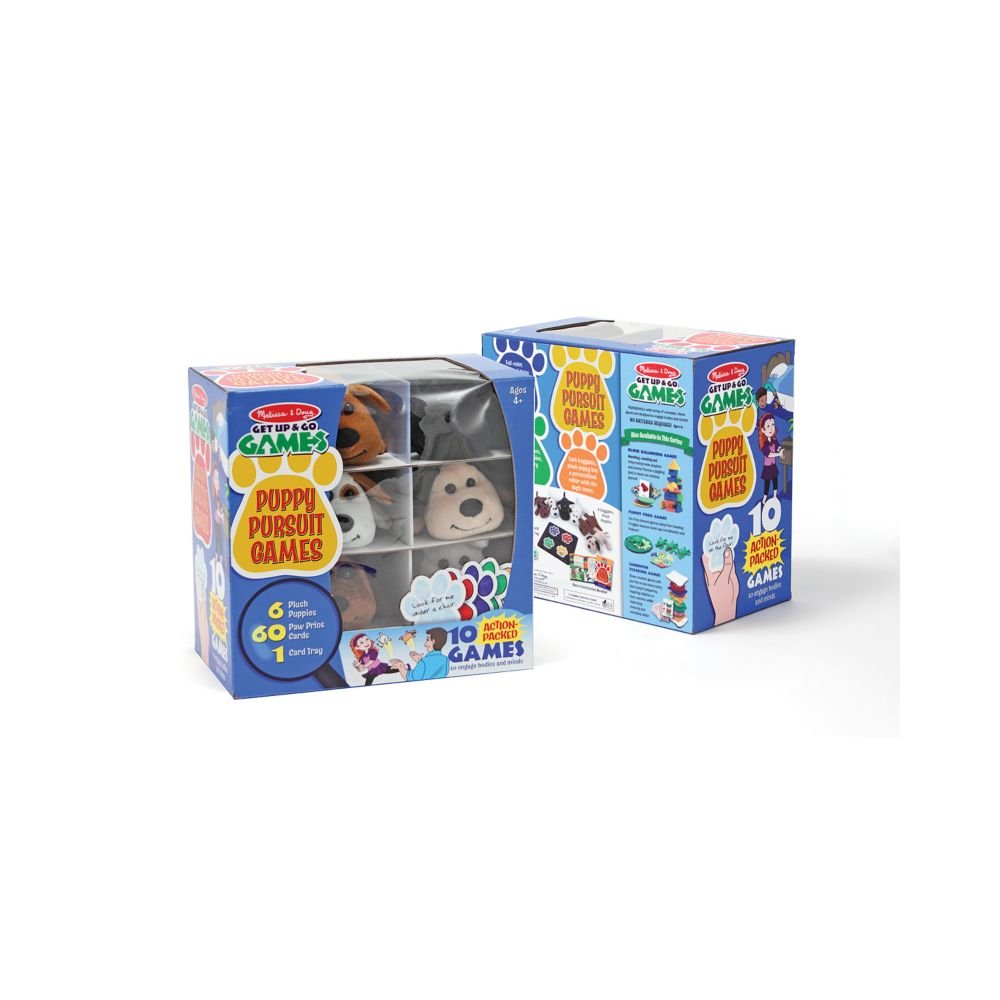
Puppy Pursuit by Melissa and Doug, which is so versatile with 10 different game possibilities. My kids just love playing hide and seek with the 6 adorable puppies! They never tire of this game!

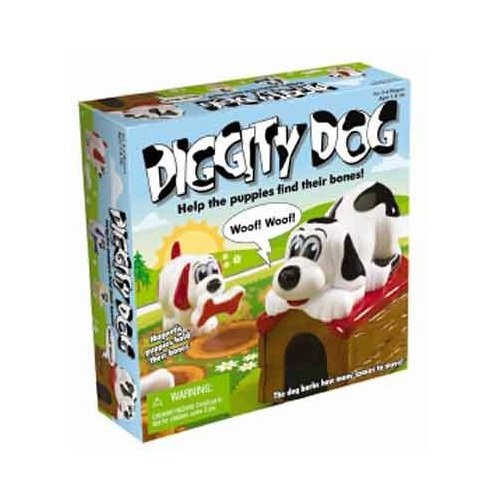
Another fun game is Diggity Dog, a color matching game great for working on colors, turn-taking, listening skills and following game rules.


I used a great book about dogs with my EET kit materials to work on organizing information from non-fiction text with my older kids:


...and this great pet hospital toy for pretend play.


But no dog week would be complete without celebrating my favorite little furry pup, Bruno!


My little buddy turned 6 years old last Thursday, so I created a whole packet of fun activities in honor of him!


It's got 8 delightfully fun activities that your kids will surely love, including Cariboo cards that can be used with your Cariboo game...


or without it by using bones to cover up the pictures if you leave them as a whole sheet, or by cutting the pictures out and hiding bones under them!


It includes 2 levels of auditory directions to make data tracking a breeze, which is something you don't often find with Cariboo card sets.

There's also a color matching game, a fun hide and seek game, an activity targeting verbs and WH questions, auditory comprehension paragraphs, a take-home book about Bruno's day, a category game and some open-ended materials.  My kids LOVED these activities and I'm sure yours will, too.  You can find it here.

Happy Puppy Day!!!

Pam 

January 10, 2014

Don't Break the Ice Game Companion for Winter Clothing Vocabulary


We've been having so much fun using the Winter Clothing Vocabulary Cards from my Indoor Snowball Fight that I decided to make a companion activity that can target a bunch of goals based on the same theme.  My kids go BONKERS for Hasbro's classic Don't Break the Ice Game, so I made some materials to use while playing it.  And I was right...it is a HIT (no pun intended)!

Here's what you do:


Then, decide if you want to use these game cards...


...or these!


The players take turns turning over a card and tapping a matching ice block until it falls.  Play continues until all the ice breaks and everyone laughs!  And then play it again.  And again.  And AGAIN, if the kids get their way!!!

I've used this game this week with kids ages 2-12.  Did you catch that?  Two-year-olds were able to play this without smashing all the ice blocks in at once.  I think having the pictures on them really helped to slow it down.  Here are some of the goals I was able to target:

*  articulation:  CVC, CVCV words for my younger kids; /th/ for "this" and "the"  as in "This is the match; final /s/ in "ice", and the list goes on.

*  receptive vocabulary:  finding items based on attributes comes to mind immediately, but also matching pictures and identifying items by their names.

*  expressive vocabulary:  winter clothing words, adjectives such as warm, cozy, stretchy, itchy

*  third person singular verbs:  when using the attribute cards, I had my students respond using complete sentences that included third person singular verb.  For example, "A hat COVERS my ears."  "A snowman MELTS".

*  use of have/has:  "Boots have laces."  "Hot cocoa has steam."

*  following game rules and turn taking.

That's just a start.  Be creative and I'm sure you'll find many ways to use this with almost all of your kids.

Do you love it?  You can find it at my TpT store here.

Have a great weekend everyone!


December 16, 2013

Let's Have a Snowball Fight!

It all started with a bucket of snowballs...


I saw this online a couple of weeks ago and just had to get them!  It's a bucket of six, soft, fluffy snowballs whose sole purpose in life is to be thrown.  I mean, come on, who doesn't want that???
So of course I've found MULTIPLE ways to use them.

I've got several little preschoolers who struggle with following simple directions, so my first thought was to use this with them.  Here's what I did:


I made a set of cards for following simple directions that include snowmen throwing snowballs and Christmas vocabulary.  I also made matching vocabulary cards that were a little larger, which I taped to some cardboard blocks to use as targets.  I set up two blocks at a time at the edge of the table, and separated the cards into two stacks and placed them face down on the table.  Next, we turned over the top card of each pile and read the direction together.  In the example above, we said, "Throw a snowball at the elf."  I gave the child one snowball and she threw it at the corresponding block until she knocked it down.  Then we repeated the steps with the remaining cards and blocks.  This game was a big hit (pardon the pun!)!!!

I was thinking you could do this, too, even if you don't own a set of snowballs like these.  You could roll up white socks to make your own snowballs, or you could use Styrofoam balls that you can find at a craft store.   You could use tissue boxes instead of cardboard blocks.  And you could use these, too:


Just a little freebie for you to have a little fun with this last week before Christmas.


You can find it right here,  at my TpT store.

So of course, I couldn't just leave it at keeping this activity for Christmas.  I want to use it all winter long!  And I wanted it to be useful for a wider variety of preschoolers.  So, I made another set, this one for working on following directions that include size concepts, prepositions and winter vocabulary.

Now we have six choices for actions.  The basic set...


...and at the request of faithful reader, Maria, a second set for more complex directions.


We also have...


...two sizes of snowballs to throw ( I added a bucket of cotton balls to the mix)...


...twelve winter vocabulary words on object cards...


...and 12 vocabulary cards to be used as targets.  This is what it looks like when we play:


Of course, the target blocks are not really this close to the picture cards when we play.  I just had to move them together for the picture.  Sometimes I even move the target blocks to various places in the room for bigger throws.  It just depends on the age and ability of the child.

I also decided to add preposition cards to this set.  There are five different prepositions in all and 4 blank snowball cards for you to customize according to your needs.


When using the preposition cards, I remove the action cards from play, because in this version, the child does NOT throw a snowball.  The child puts the snowball in the correct location as described by the action and object cards.  Like this:


You can increase the level of difficulty by adding the size cards, or by adding a second object, and by combining cards in a variety of other ways.

Do you like this one, too?  Find it here.

Here's another idea for your toddlers:  


Sorting snowballs by size!  With a little bit of throwing them thrown in for fun.


October 22, 2013

Trick or Treating Practice

I don't know about you, but I get asked by parents each October about how to practice the whole trick-or-treating sequence with their child.  Halloween is one of the most exciting holidays for most kids, from toddler years through middle school, and every parent wants their kids to be able to participate to their fullest potential.

One place I like to start is with a toy house and figurines and a social story.  The house I have is from Melissa and Doug.  It's made of wood and has four separate doors with locks and keys and four figurines.  I usually read the social story I posted last year to introduce the activity.  It's a very simple story, shows the trick-or-treating sequence clearly and is easy to use.  After reading the social story, we move right to the house.


We take a figurine, have it ring a doorbell, and then open the door.  I will either have a picture of a child wearing a costume inside the house, or another figurine.  We practice saying "trick or treat!" after the door is opened, pretend to hand out candy, say thank you, and then close the door and say good-bye.  Then we turn the house and move to the next door.


This is a great opportunity for my non-verbal kiddos to practice using a voice output device.  I like these simple single-message devices which are easy to record and easy to carry.  You can find these or something similar at Mayer-Johnson's website.  I programmed mine so one says "trick or treat" and the other says "thank you".

The kids never seem to tire of this activity, so I've learned to extend it to work on other goals as well.  I keep a stack of cards of kids in costumes close by so we can change out who answers the door or rings the doorbell.  It's a great way to learn new vocabulary and work on articulation.  I got my cute set of trick or treaters from Carrie's Speech Corner last year and they continue to be a hit with the kids.


Another thing the kids love to do is to decorate the house for Halloween.  I keep a variety of cutouts that I made with Scrappin Doodles clipart close at hand.  The kids tell me which piece they would like to have and where they plan to put it, and then stick them to the house with tape or other removable adhesive.  They love to create silly Halloween houses, which often leads into them telling me how their own house is decorated.  It's the perfect opportunity to work on descriptors, vocabulary and comparisons.

I have also used the clipart cutouts for following auditory directions.   Here's a sample of some of my directions:


 You can email me if you'd like a copy.

Sometimes the kids like to hide something in the house and give me directions on where to look, such as "look in the house that has a red door with pumpkins next to it."  They love to be the teacher, too! There are SO MANY ways to use this set of materials for SO MANY goals!  If you don't have this exact house, I'm guessing any toy house would work.  All it has to have is a door that opens and closes.  You could even use a barn and pretend it's a house.  Whichever house you decide to use, I'm sure your kids will love practicing trick-or-treating as much as mine do.

Happy Halloween!

Pam


April 10, 2013

Froggy's Feeding Frenzy

Happy Spring!  In honor of all the happily chirping birds and croaking frogs outside my window, I created a new game:  Froggy's Feeding Frenzy!  Here's what it looks like:


Do you remember Rudolph's Crazy Cookie Exchange Game?  This one is very similar, except with a frog/bug/bird theme that can be used year round.  Check out that post to see what I'm talking about.

Players take turns feeding bugs from their own "collection" to the animals by following the directions on the playing cards.  Here's a sample of the direction cards:

Play continues until a player serves all of the bugs in his or her collection to the hungry animals.  It's not as easy as it seems...sometimes the animals want to trade their bugs with a friend, and sometimes they get a little fussy and send some bugs back.

This game is great for working on a variety of goals in addition to following directions.  It's chock-full of opportunities to work on those pesky /r/-blends, third-person singular verbs and negatives, not to mention rule following and turn-takings skills.

Swing by my TpT site for a full description of this game and to download a preview here.  Graphics credit goes to JW Illustrations, Kelly Medina Studios, Goodness & Fun, and Small Talk Graphics.

Have fun and let me know what you think!


Pam

December 8, 2012

Saving Time: Repurposing What I Already Have

Who has time to put together one more elaborate activity before the Holidays?  Not me!  I'm going to show you how you can repurpose something you probably already have and make a useful activity that can be used with multiple kids.  Let me introduce Lift-the-Flap Presents!


I had a few extra present cards left from making Clothespin Christmas Surprises and found a great way to turn them into  something fun and useful.


First, I printed off a page of picture cards.  This one happens to target the /k/ sound.  I put it in a plastic page protector.


Starting at the bottom of the page, I taped a present to the page protector, positioning it over the top of one of the squares from the picture card set.  I put tape along the upper edge only, so the present card becomes a flap to lift.


I continued to tape the presents over each square, filling the rows from bottom to top.  That's it!  It's ready to be used!


Here's the great thing:  you can store multiple pages of picture cards in the same page protector.  You just need to make sure that the one you need is on the top of the stack!  So, since the presents are taped to the page protector and not the actual page of picture cards, you can use this activity with a child working on /k/ in one session, and then quickly change it to work for a child working on /s/.  Just find the page you need and slip it in!  Easy, huh?

Of course it helps if you use sets of picture cards that all come from the same source so the grids are the same size.  I use the ones I created on lessonpix.com.  If you don't know about LessonPix, you should.  You can create your own sets of picture cards and other materials in minutes.  You choose the targets based on the sound and position in words, click a button, and then download your materials directly to your computer to save and use whenever you need them.  So easy and SO COOL!

I'll be using this for articulation for sure, but I'll probably find other ways to use it, too.  How about for irregular plurals or other grammar targets?  How about for following directions? "Open the green gift in the bottom row."  Or, "After you open a red gift, open a pink one."  How about visual memory?  Have them open one row of gifts, name them, cover them back up and then see if they can tell you what the three gifts were.  Oooh, I like that idea.  I might do this with Christmas vocabulary!  I know, I'll use the sheet of cookies from Santa's Cookie Slam! Game!!!


Wow, THAT was easy!  Especially since I used the same grid template to create both the presents and the cookies.  No resizing necessary!  I actually tried this with a fourth grader and it worked great.  This is what we did.  First, I had her open one vertical row of three presents, name them, close them, and then say the names of the three presents.  We repeated the sequence for the remaining three rows.  To make it more difficult, I added a 5 second delay between the time she closed the flaps and telling the names of the gifts.  After two rounds of opening vertical rows, we moved on to opening horizontal rows.

I'll bet you could come up with some ways to use this idea, too.  Will you please share?