Facebook Instagram Pinterest TeachersPayTeachers BlogLovin Home Image Map
Showing posts with label preschool activity. Show all posts

March 29, 2017

Jumping Jack: How I Use My Favorite Spring Game


My new favorite game for spring (or anytime!) is called Jumping Jack by Goliath Games. It is a bright, appealing game similar in play style to an SLP favorite, Pop Up Pirate, that can be used with both preschoolers and elementary school students. Students take turns pulling carrots out of the base, trying (or maybe, NOT trying) to make the rabbit jump out of his hole.

I love using games like this for the following reasons:

  • High-interest: the students generally enjoy games that have some level of anticipation associated with them. They want to play them again and again.
  • Easy to play: there are very few rules to follow.
  • They promote joint attention and turn taking: players happily watch other players take turns, watching to see if the rabbit will jump.
  • Simplicity: There are very few pieces to manipulate.
  • Flexibility: I can adapt the way we play the game by adding companion materials designed to target speech and language goals.

In the photo above, students practiced their speech sounds while playing the game. Each student was given a page of stimulus pictures that contained their target sound. Students took turns choosing a target word to say, practiced it a specific number of times, and then removed a carrot from the base. If the rabbit didn't jump, the students placed the carrot on top of the picture. Play continued until the rabbit jumped, and then we played again. The picture pages featured in this photo are from my product Itty Bitty Black and White Articulation Cards and can be found in my Teachers Pay Teachers Store.

The more I played Jumping Jack with my students, I realized I needed more companion materials to target both speech and language skills. So I created Jack's Garden of Carrots:


This packet contains 89 black and white activity sheets that are perfect to pair with Jumping Jack, but can also be used as a stand-alone activity. It contains two separate sets of articulation pages, one with pictures (all the most frequently targeted sounds and blends) and one with words only (later developing sounds). Language targets include synonyms, antonyms, multiple meaning words, describing, categories, comparing, contrasting, answering WH- questions, and inferences. I use these sheets at the same time as the game, completing a task before each turn, and sometimes I have the students complete the worksheet before we play the game.


Sometimes I use these print and go sheets with dot paints, and other times I'll use play dough or mini erasers to cover the carrots.

Here's a photo of using an articulation sheet while we play the game...


 ...and here is one of when we completed the worksheets first. I had one student paint the tops of all the carrots and the other paint the bottoms the first time through the target word set, and then we traded paints and said all the words again. I got double the amount of reps! Score!


To push my luck even further, and get even MORE milage out of this handy dandy worksheet, I had the students say their words again before they removed carrots while playing the game. We covered the carrots with bunny erasers to keep track of the words we said.


Here's a shot of us using mini erasers to cover the carrots while we practice describing the size, shape or color of objects.


Honestly, this game is so much fun and so flexible! I love it when I can use one item to target so many different skills.

What do you think? Do you use this game or one that is similar? I'd love to know!


October 15, 2015

Put Your iPhone Camera to Work: Creating Stories for Your iPad


I love to make stories for my students using my iPhone and photo editing apps. It's really easy! Let me show you how I do it.


Every fall, three little gnome brothers turn up in my speech room to play. If you'd like to see the magical gnome home I created last fall, read this post. Each day, the kids arrive to find those industrious gnomes playing with our toys. This is how I made a story to record all the little gnomes' antics. I wrote this story to specifically target the pronoun "he" and regular past tense verbs.

I started by taking pictures every day of the gnomes posing with their toys.  After a week or two, I had enough pictures to make a story.


I load the pictures onto my computer and open the Picasa app.


I select a picture and then click on the "text" icon on the left side of the screen.


I type the text directly onto the picture. You can choose from a variety of fonts, colors and sizes. Then I click "apply" to save the changes to the picture.


I click the little green symbol above the red circle to hold the completed picture in the tray along with the others I want to add to my story. When I have the ones I need, I save them as an album.


Next, you have options of what you want to do with your story. You can save this file to iPhoto and just view the pictures on your phone or iPad, just like you would with any photographs. But I like to save mine to Dropbox so I can open the file and view just the photos in the file and so I can share the Dropbox link with families.  Here's what I do:


First I save the album to my desktop. Next, I choose the file from my desktop, and then click on "Move to Dropbox".

Once the file is in Dropbox, I can open it on my iPad or my iPhone and view the story, swiping the screen to turn the pages.

See? Wasn't that easy? There are probably many other ways to edit your photos to make a story, but this one really works well for me. I love that I can share the links with parents and that they can access them anonymously. The kids really enjoy them, too.  It's a great way for them to share about speech/language therapy with their families at home and practice their speech and language targets while doing so!

March 23, 2015

It's National Puppy Day!

My Grand-Puppy Murphy!!!
I opened my computer this morning and discovered that it's National Puppy Day! It couldn't have come at a better time, because it's been all about dogs around here at Small Talk.  Want to know what we've been doing? Great! Because I can't wait to share!

We've been playing fun games like...


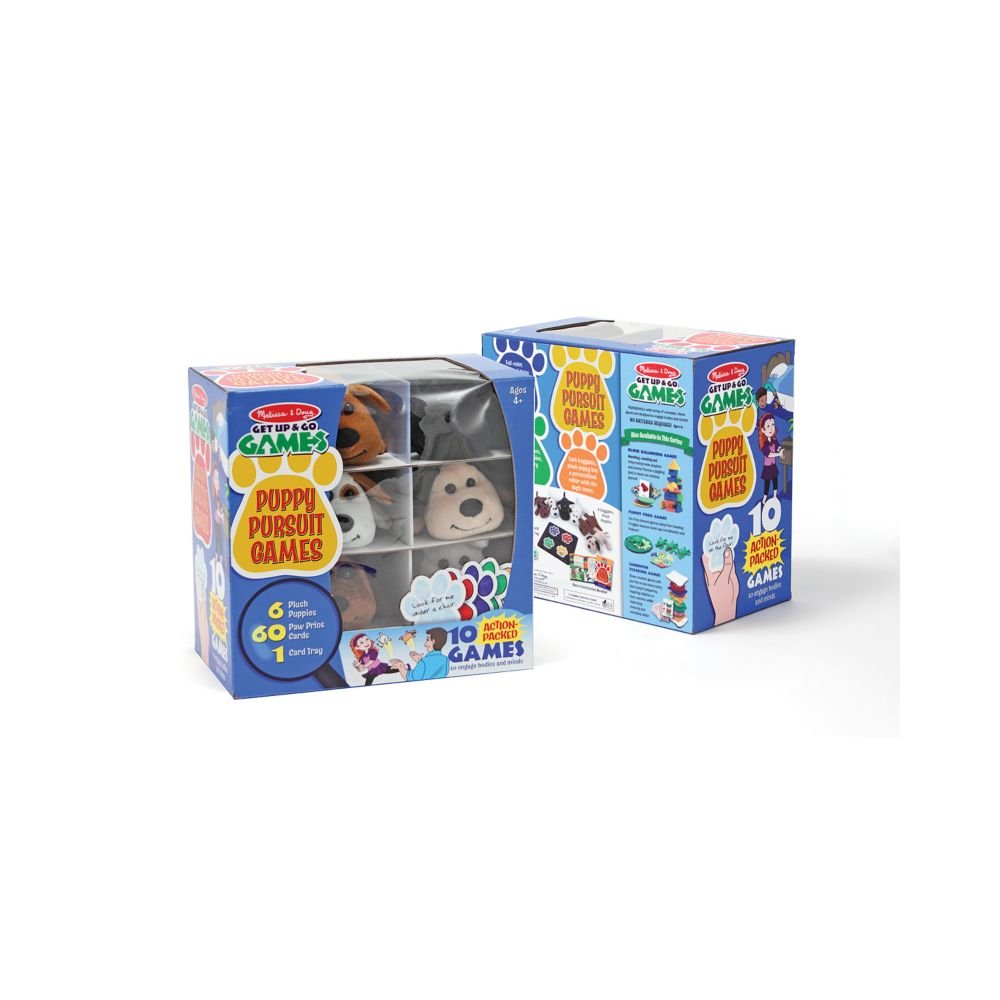
Puppy Pursuit by Melissa and Doug, which is so versatile with 10 different game possibilities. My kids just love playing hide and seek with the 6 adorable puppies! They never tire of this game!

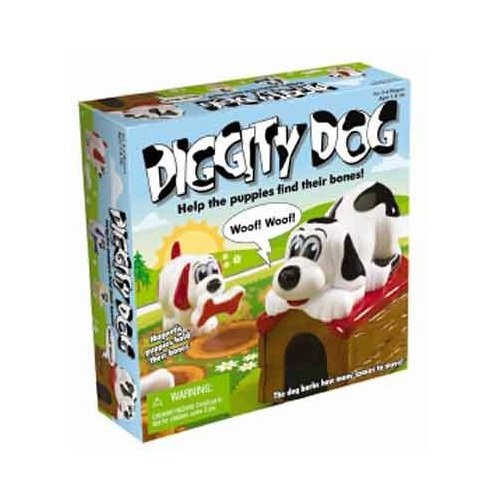
Another fun game is Diggity Dog, a color matching game great for working on colors, turn-taking, listening skills and following game rules.


I used a great book about dogs with my EET kit materials to work on organizing information from non-fiction text with my older kids:


...and this great pet hospital toy for pretend play.


But no dog week would be complete without celebrating my favorite little furry pup, Bruno!


My little buddy turned 6 years old last Thursday, so I created a whole packet of fun activities in honor of him!


It's got 8 delightfully fun activities that your kids will surely love, including Cariboo cards that can be used with your Cariboo game...


or without it by using bones to cover up the pictures if you leave them as a whole sheet, or by cutting the pictures out and hiding bones under them!


It includes 2 levels of auditory directions to make data tracking a breeze, which is something you don't often find with Cariboo card sets.

There's also a color matching game, a fun hide and seek game, an activity targeting verbs and WH questions, auditory comprehension paragraphs, a take-home book about Bruno's day, a category game and some open-ended materials.  My kids LOVED these activities and I'm sure yours will, too.  You can find it here.

Happy Puppy Day!!!

Pam 

November 19, 2014

Gnome Home: The Magical Fun Continues


All last week, my kids were enchanted to find evidence of the gnomes settling into their new home.  They found a ladder perched up against the tree, a wagon next to the path, a rake made of twigs near the wagon, and a twiggy broom leaning up against the door.  There was even a tiny basket with a pumpkin sitting on the table.  As they came into the room, we talked about the objects they found.


I took pictures of each of the new items and had them ready to show the kids.  This gave us opportunity to practice vocabulary words as some of the objects were unfamiliar to some of the children.  I also asked them what they thought how the gnomes might use the objects.  This led into a very fun object function game where we pretended to be gnomes.


I made two versions of this game.  In this first version, we pretended to be gnomes for the entire game.  We turned over a card, named the item, and then talked about what we would do with that object.  Then we pretended to use the item, such as pushing our imaginary wheelbarrows around the room, and sweeping with imaginary brooms.  This was such a great way to increase our verb vocabulary and practice stating object functions!


The second version of the game is a board game, where the child spins the spinner to determine the number of spaces to move.  If the child lands on a circle, he or she draws a card, names the item on the card and states its function.  If he or she lands on a flower, the child must also pretend to use the object.  This worked so well to work on pronouns and auxiliary verbs in addition to the vocabulary/object function goals.  If you like these games and would like to try them for yourself, be sure to look for them in my TpT store in a week or two.  They haven't been added yet, but some day, they'll magically be ready.  Just leave a comment for me to let me know you're interested.

This week, the gnomes are starting to leave signs of mischief around my room.


I left their wagon with some acorns in it on the sidewalk leading up to my door so my little friends would be sure to see it.  Each child has arrived at my door, excited to show and tell me what they saw.  We start language treatment the INSTANT we say hello.  They tell me where they found it, what was in it, and how they think it got there.  I tell them that the gnomes have been very busy and very forgetful, leaving all their tools inside my room.  When we get to the table, I show them the cards with the pictures of the tools from last week and explain that the gnomes forgot their things in my room, and we need to help them by finding the objects and returning them to the gnomes.


We put the wagon in the basket that the gnomes left behind (along with a pile of acorns) and started to look for the other items.  


We found their broom in the sticker box...


...the ladder on top of the clock, and the basket and rake in other easy to find locations.  This was a great way to practice prepositions as well as laugh about what those silly gnomes did!  We talked about how we thought the gnomes got into my room, and how each thing ended up where it did.  Pure imagination!  We reviewed how the gnomes might use each object, practicing the skills we learned last week.  And then we collected the objects in the green basket to return to the gnome's yard.


Since prepositions were such a natural target, we played a little preposition game using the acorns from the wagon.  We used a gnome-sized trash can and some picture games to practice putting the acorns in, on, next to and under the trash can.  We talked about acorns, a new word to many, and very fun to play with.

At the end of each session, we reviewed the picture cards once again.


We talked about where those silly gnomes left each of the object and, if the parent wasn't present, we used the cards to help tell the story of where each item was found.  

The kids are LOVING these silly gnome activities!  I wish you could see them stopping to look at their house and yard each time they pass.  I wish you could see how much they talk to their parents and grandparents about the gnomes and what they see.  I wish you could see the magic in their eyes and excitement on their faces when they spy evidence of gnome activity.  I am having so much fun, too, and am amazed at the scope of speech and language learning opportunities that are directly tied to my sweet little gnomes.  It's beyond my wildest imagination!

June 12, 2014

Owls, Owls, Owls!


This week at Small Talk, we've been reading the book, Owl Babies, by Martin Waddell.  This is a fantastic book for preschoolers that tells the tale of three babies owls who wake up to find that their mother is gone.  Sarah and Percy are very brave, but Bill just wants his mommy!  The owls make guesses about where their mother might have gone, but become less brave the longer they wait.  Finally their mother comes back and the baby owls rejoice.  It's a great story that most little ones can relate to, and its just plain adorable!  Here are some of the owl activities I planned to go with this book:


Sorting day and night objects:  I gathered small objects of things that we see or do in the daytime or the nighttime and put them in my mystery box.  I made a mat for the daytime objects and one for the nighttime objects.  Kids reached into the mystery box, pulled out an object, labeled it and then put it on the corresponding mat.  This activity was so great for improving vocabulary skills and answering "when" questions, not to mention sorting items of a category.


Following 2-Step Directions Game:  I made a cute open-ended game board that I used for several different activities depending on treatment goals.  This one was one of the kids' favorites and could be played with a single player or several.  Players turned over a card, I read the directions on each card, and the child performed the actions to follow the directions.  Many of the direction cards contained actions an owl might do, such as flap their wings or say "hoo hoo".  For the kids still working on novel 1-Step directions, I used the same cards, but only gave one part of the the direction.


I turned my Butterfly Garden canopy into a treetop that covers the ceiling in my office.  I attached felt leaves with safety pins and it feels like we are sitting right among the branches.  The kids made owls to hang from the canopy.  It's magical!


Look what I found at my favorite toy store...Owl flashlights!!!  We'll be using those next week when I hide the Mommy Owl around the room.  We'll turn off the lights, and go on an owl hunt!  I can't wait!  I'm sure it's going to be fun!


I've been using this awesome toy as a reinforcer during drill activities.  After the child says the target word or phrase, he or she gets a piece to put on the tree.  This darling wooden tree set comes from Hearthsong and has lasted many years.


Since the Owl Babies text includes many past tense -ed verbs, I decided to make a game to provide more past tense -ed opportunities.  I made another game board that explained that the baby owls watched the kids who were busy in the house and yard below the owls' tree.  Players took turns drawing a card and describing what the owls saw the kids do.  This worked great for both past tense verbs and pronouns.  I even used this game with my older elementary kids who are about to join a social thinking group and are working on identifying another person's plan.  I had them make a "smart guess" about what the person on the card was doing, or how they might be feeling and then had them make a guess about what that person might do next.


And speaking of games, these two games are great for preschoolers.  Easy to learn, easy to play, and not much set-up required.  I found these at my favorite toy store, too.


Last but not least...look at this adorable owl!  His eyes pop out when you squeeze them!  I can probably find a million different ways to use them, but for now, we just say our target words 5 times while we squeeze our owls (I have an orange one, too)!

Whew, that's a lot of fun crammed into one week!  I'm exhausted!  Do you have any owl ideas to add to my plans?  I'd love to hear them!


January 21, 2014

Mitten Craftivity for Preschoolers


This week at Small Talk, we're all about one of my favorite winter stories, The Mitten by Jan Brett.  It's a great story about forest animals who all push their way into a cozy mitten that was dropped in the snow.  I thought I'd share one of the activities we'll be doing with you.  It is this easy mitten "craftivity" that your little ones are sure to love and you can use to cover a variety of goals.


Start by tracing a large mitten shape onto white card stock and cut it out.  Next, cut a smaller mitten shape out from the inside of the mitten, leaving a 1/2"- 1" frame.  Trace the outline of the mitten onto the grid side of a sheet of clear Con-Tact paper and cut it out.  Peel off the grid paper, exposing the sticky side of the Con-Tact paper.  Place your mitten frame on top of the Con-Tact paper mitten, matching the edges.  Place the grid paper back onto the mitten, protecting the sticky surface until you are ready to use it.


Gather up some pieces to stick on your mitten.  I used some snowflakes I made with a paper punch, some squares of white tissue paper, and some pictures of the animals featured in The Mitten.  The animals I used are from a darling graphics collection by KPM Doodles.


Stick the snowflakes and mittens onto the sticky side of the mitten.  Be sure to place the animals face down.


Then, put squares of white tissue paper over the animals and the snowflakes, making sure to cover all of the sticky spots.  Turn it over to see all the animals inside the mitten!  I love this!  It's so easy and so CUTE!

I plan to use this for a variety of goals, including following directions, articulation, vocabulary, basic concepts, and a simple story retell.

What do you think?  Check back later in the week to see what other activities I have planned for my Mitten theme.  Until then, stay warm!